DIY: turn old t-shirts into easy chair pocket storage for the classroom
- jillmacchiaverna
- Aug 1, 2022
- 4 min read
As a pre-k teacher, I decided my students will keep portfolios this year. They learn so much so quickly! I want them to be able to look back at their work from just a few weeks earlier and see how quickly they are growing. Not some wimpy little one-inch binder. Imagine putting your best work from 180 days into that! We glue pasta on paper to represent the butterfly life cycle, people. It was going to be 3-inch binders or nothing. Plus, that was the size I had already found for free.
But where to store portfolios? How to make them easy for students to access? Classroom space is always at a premium. A cluttered room is a cluttered mind. Shelves were already full. I had heard my PTA friends talk about turning old spirit t-shirts into bags. I had dozens of old t-shirts crowding my dresser. I figured if a t-shirt could be turned into a bag, I could probably figure out how to affix it to a chair. Thus, the DIY t-shirt chair pockets were born!
I’m sure there are more elegant ways to do what I did. Feel free to iterate on the design! Especially if your chairs are a different size and shape. My classroom chair backs are nine inches wide at the top and two-feet from the ground. Medium and large t-shirts were big enough for my project. Lots were stretchy jersey material, so I used a walking foot the whole time. Below are the instructions for my design:
1. Cut down the sides of your t-shirt. (I ironed my shirts to guide me when there were no side seams.)

2. Fold the wrong sides together and pin as close to the collar as possible. I had to draw myself a guide to make a straight line. The intention is to maximize the amount of cloth available for the project.

3. I used a straight stitch all the way across, then opened the fabric, folded down the excess that would be cut off (the part with the neck hole), and sewed another straight line. This was to reinforce the fabric so it wouldn’t stretch too much when the weight of a binder was added to the pocket.

4. Here’s the finished, outward facing seam:

5. Here’s the unfinished, inside view with the excess cut off:

6. Spread out the fabric, right side up, to make the folds that will let you know how much material (if any) you have available for an extra, outside pocket. This is also the step where you decide whether you want any designs on the shirt to show up on the student-side of the chair. (Whichever side you want to be visible on the student side of the chair back, start folding from the opposite side.) I needed 12” deep pockets, so I folded over one side -- right sides together -- until it was folded over by 12”.

7. Mark where the fold is. Sometimes adding a cut in excess sleeve fabric helped me flatten the fabric and make it more manageable.
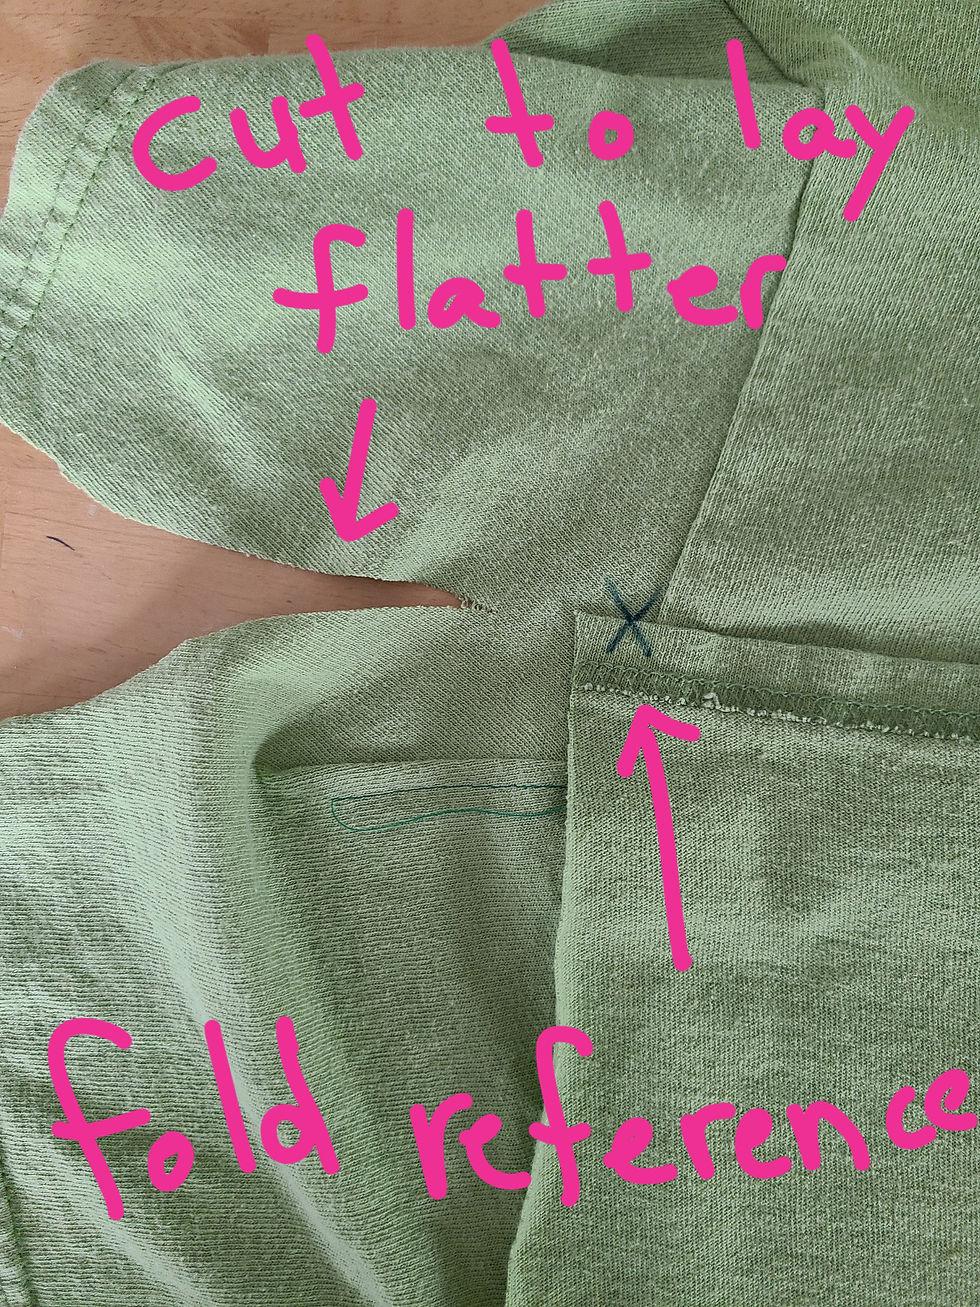
8. How low will your pocket hang from the top of the chair? I only had two inches because my students’ chairs are so short. Fold over the other side of the fabric -- bringing right sides together again -- at the top-of-the-chair fold.


9. The back of my students’ chairs was about 12” tall before it reached the seat. So I measured 12” from the top-of-the-chair fold and cut… BUT I turned the fabric back up an inch and pinned it. I left the seam unfinished because I thought a seam where the hard seat turns into a back might be uncomfortable to sit on. It probably would have been fine. My mother would have put a finished seam there.

Pretend the following picture doesn’t already have the outer pocket sewn on. It took me a few prototypes to get the workflow right. After cutting off the excess fabric (which will be the outer pocket), turn up and pin (wrong sides together) the side of the fabric that will be unfinished. The unfinished seam will be at the students’ backs.

10. Flatten the fabric back out at the binder pocket end. Line up the excess fabric you just cut on top of the fabric where you would like to have your outside pocket. Then flip just the outer pocket fabric down so you can sew a seam that will create the bottom of the outside pocket.

11. I have to pin everything or I get lost. Use a serger machine or faux serger stitch for this and the rest of the seams because jersey material is stretchy. (I do not have a serger machine. Faux stitches faux the win!)

12. Admire your first hint of success.

13. Spread it all back out, and fold it up again. The way you did in Step 8, but making sure not to lose the outer pocket fabric. In this picture, I was using the binder pocket to fold over and hide the graphic on the tee, a choice I regret now.


So now it looks like it did at the end of Step 8, except there's another layer nestled in there for the outer pocket and the opposite end doesn't have excess fabric anymore:

14. While you are doing the complicated fold of Step 13, the cat will try to help you, making you increasingly frustrated.

15. Go for a walk. You might see a hawk!

16. I needed my pockets to be 16” wide to hold a fat 3-inch binder, but I needed the top-of-the-chair fold to be more snug on the 9” ‘shoulders’ of the chairs. I measured 16” on both sides, drew lines across to guide my seam, pinned it…

17. …and then measured 13” on the top-of-the-chair fold, cut off the excess fabric on the sides, and sewed at an angle from the top-of-the-chair to the top of the pockets by eyeballing it at my machine.


18. Turn your chair pocket right side out, and voila! You are done! (With this one. Only 19 more to go, if you are a pre-k teacher!)

19. Slide the chair pockets over the back of your students' chairs and let the open amazement and hidden jealousy of your colleagues wash over you.


Side note: I was still able to stack chairs by twos by having them face opposite directions.
Wishing you all the time, space, support, and materials you need to personalize education for your students this year!

Comments